Mystery Quilt......Sewing Instructions 5
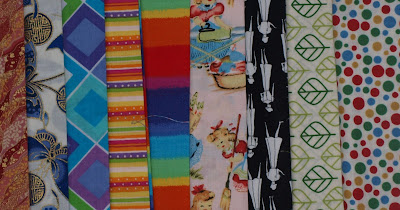
I don't have many photos of the next few steps...sorry...got carried away sewing it together and forgot....so you will have the use the last photo as a guide....
Take the flying geese with wings and sew four together into a row... you will end up with 6 rows of 4...make sure all the flying geese are going the same way when you sew them...I didn't...got carried away with what I was doing and had to unpick...opps!
Sew 4 of the pin-wheel/flying geese together in a row...giving you two rows of 4...making diamonds in the middle...
.JPG)
Feature Fabric/hourglass blocks sew them in alternating sequence into 3 rows of 3 then on the right hand end of each row sew the feature block/flying geese and on the other end the spare flying geese giving you three rows of FF/hourglass alternating with a flying geese (goose??) on each end. These photos are not the right colours scheme but are of a second quilt I'm making in the same pattern.


Then sew the rows together as pictured....so that each feature square is a square-within-a-square type pattern...
As for the border....this is where the instructions may get a little hazy....I had a little bit of trouble with mine...This is a learning curve after all....so you can add any type of border you like...but if you have cut the border strips as per the instructions here's how you can use them....i think...i hope....
If you used the 130cm of feature fabric for your border, it will be long enough without piecing....so measure through the top, bottom and middle of the quilt, work out the average of the three measurements and cut the 4 strips this long (should be about 47 3/4 inches) add one to the top and one to the bottom. Sew the 4 remaining dark squares to the ends of the other two strips and then attach to the quilt.
If you used the 80cm of feature fabric for the borders you will have to piece them making four strips the length of the sides of the quilt...I feel a bit bad as I don't have specific instructions for this part....I just measured mine and then put them on....but have now realise that I had a 1 metre (not just 80cms of fabric) so telling you specifics of how I did mine will be useless...
So do the best you can...add the dark corners to the ends and sew them on....I've had another look at mine and will be doing some unpicking as I'm not happy with the borders....you can't see it very well in the photos but I have very small pieces added in each corner and it looks dodgy...so my brain wave is to take out the dodgy bits and add a square of one of the other fabrics instead of the dodgy bit, maybe in the aqua fabric...okay now I'm waffling........so
Ta Da!! Here it is in all its glory...
Hope you had fun putting it together!!
This is a paper coloured-in version that I did all of my planning and counting (and re-counting) of triangles from!

Take the flying geese with wings and sew four together into a row... you will end up with 6 rows of 4...make sure all the flying geese are going the same way when you sew them...I didn't...got carried away with what I was doing and had to unpick...opps!
Sew 4 of the pin-wheel/flying geese together in a row...giving you two rows of 4...making diamonds in the middle...
.JPG)
Feature Fabric/hourglass blocks sew them in alternating sequence into 3 rows of 3 then on the right hand end of each row sew the feature block/flying geese and on the other end the spare flying geese giving you three rows of FF/hourglass alternating with a flying geese (goose??) on each end. These photos are not the right colours scheme but are of a second quilt I'm making in the same pattern.


Then sew the rows together as pictured....so that each feature square is a square-within-a-square type pattern...
As for the border....this is where the instructions may get a little hazy....I had a little bit of trouble with mine...This is a learning curve after all....so you can add any type of border you like...but if you have cut the border strips as per the instructions here's how you can use them....i think...i hope....
If you used the 130cm of feature fabric for your border, it will be long enough without piecing....so measure through the top, bottom and middle of the quilt, work out the average of the three measurements and cut the 4 strips this long (should be about 47 3/4 inches) add one to the top and one to the bottom. Sew the 4 remaining dark squares to the ends of the other two strips and then attach to the quilt.
If you used the 80cm of feature fabric for the borders you will have to piece them making four strips the length of the sides of the quilt...I feel a bit bad as I don't have specific instructions for this part....I just measured mine and then put them on....but have now realise that I had a 1 metre (not just 80cms of fabric) so telling you specifics of how I did mine will be useless...
So do the best you can...add the dark corners to the ends and sew them on....I've had another look at mine and will be doing some unpicking as I'm not happy with the borders....you can't see it very well in the photos but I have very small pieces added in each corner and it looks dodgy...so my brain wave is to take out the dodgy bits and add a square of one of the other fabrics instead of the dodgy bit, maybe in the aqua fabric...okay now I'm waffling........so
Ta Da!! Here it is in all its glory...

Hope you had fun putting it together!!
This is a paper coloured-in version that I did all of my planning and counting (and re-counting) of triangles from!


Comments
I LOVE IT!!! Hope mine looks half as good LOL!
I am sooo glad I joined in for this one. I am really happy with my fabric choices now too. Cant wait to finish mine!
Well Done AJ!
I am soooo on board for any more you choose to do. :D