Posts

Showing posts with the label Round Robin

It's up!

Image
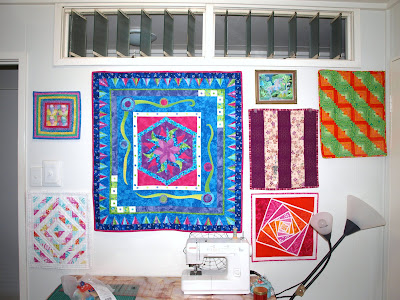
I hung my RR quilt yesterday...I had to re-arrange the whole wall but they all fit! And I even have one more space for the 2009 EB Doll Quilt Swap! Finished Size: 37 1/2" x 35" (95.5cms x 89cms)

It found its way home...

Image
My Round Robin that is! After an exciting trip down to the bottom of the country and then all the way to the west my quilt has returned home! I was truly concerned that the centre piece that I made back here was not going to be very sucessful, but thanks to the wonderful talents of some quilting friends, they have turned it around into something I really like! First it went to Joy's where she continue the circle theme...stitched in clear thread on her machine...and adds a real 'framed' element to it I think! Love the green fabric in the corner squares. Emma did the 50 (yes 50!! I counted them!!) little triangles around the final border, so cute and sooo accurate! I love the blue bubbles that matched the green ones I had used in the centre. And then last of all Helen decided it was the perfect size and she couldn't add anything to make it better...and knowing me and how many quilts I have on the go at once decided to back, quilt and bind it for me! She added to cute...
One Down.....

Image
One to go.... I finshed my border for Emma's Round Robin today...I made heaps of trouble for myself by using 'Y' seams in the corners...the first one worked perfectly and the the others....well let's just say there was a lot of fudging going on...but I think it looks good and I hope Emma does too! So here is your sneak peak Emma...it is hard to take a photo without giving too much away! Other than that I am still scrapbooking Mum's album...it is taking forever...only 6 days left to have it finished!

The reef comes alive....

Image
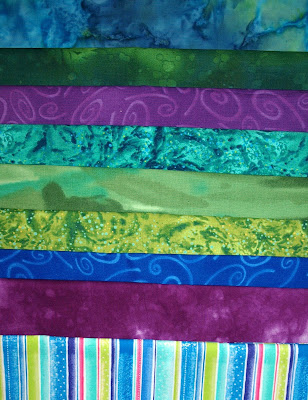
I'm hoping to bring the reef to life when I use these fabrics to add the final border to Joy's Round Robin quilt. She shows you the centre block here . The lady in the local quilt shop liked Helen's border the best...sorry girls!

Round Robin Centre

Image
I liked the patten when I started but had so much trouble with the colours, my curved piecing was terrible and unpicked a dozen times, then it looked OK. The edges were all wonky so I added a border, and then I wanted to make it easier on Joy who will add to it next and decided turn it into a rectangle. It took me three goes ( and wasted material) to get the triangles right and still the edges were terrible. I decided a framing border would look nice so I added one......and now the more I look at it the more I don't like it!! I'm hoping Emma and then Helen , along with Joy can make me love it again....I'm sure they will!!

Tips for curved pieceing...

Image
from experience!! pulling the fabric to make it work doesn't always help....stretched fabric is harder to work with go S.L.O.W!!! just beause the first one worked out doesn't mean the next one will puckers add character (!!) use small stiches but not too small because there will be unpicking fudge it as best you can don't get cocky - see second point a good iorn will hide a multitude of sins don't do these when you are tired - they look worse when you get up in morning when pinning don't make puckers don'tgive up easily - walk away and then come back and try again when admiring you work stand back form it and don't use a maginifying glass make sure the templates are the right way up!! leaving the needle down and lifting the presser foot to re-arrange the fabric underneath is allowed and it works wonders cheer yourself up with a little 'yessssssss' everytime you get a seam right - it amuses your husband don't get cocky - did I ready mention that!?...

Curved Pieceing

Image
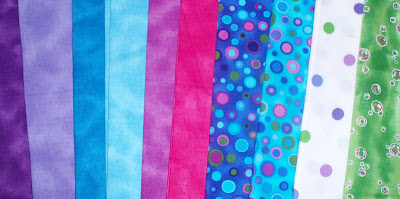
These are the materials I have come up with...It didn't use much to make the block so now I have to decide how much to send on with the quilt and what to keep back for finishing it off when I get it back...might have to ask the others for their opinions. And then the fun began...also some unpicking but not too much. I've decided I'm not very good at curved piecing...but I still have lots to do so I might get better....maybe?!?! Pieces cut out...layed out to see how they look... In pieces...starting to take shape The first finished block... Here are the rest of the pieces cut out ready to join...after this picture was taken, I tried to sew piece number 8 on....I then realised that I'd cut them out backwards....the template must have been flipped over but I didn't realise cause an 8 is an 8 backwards too!! So I had to trace and cut the pale blue circles again...bummer This is two finished triangles sewen together

Way out of my depth....

Image
and loving it!! I've joined a Round Robin with some other talented quilters and the centre block is due by the end of this month!! (I thought I had til the end of March) So with the rain and drizzle hanging around I decided it would be a perfect day for quilting otherwise it won't be finished on time. So about a month ago I decided on the centre I would like. The quilt(at the moment but subject to change) will become a wall hanging for my sewing room. I love bright colours but wanted to try something different so had pale, soft pastels in mind when I began...... After over an hour of looking through all my materials and deciding I can't really afford any new ones this month (well DH said I/we can't!!)and not having many pastels to choose from it has, of course, completely changed tracks...I have used this material as my inspiration (purchased from The Humming Mini ) and am now back on to the bold and bright that I love!! With that the way-out-of-my-depth part began. The...