Around the block 2
I needed a block...a block that others would enjoy making...I needed it to be a bit of a challenge...I needed it to be a bit different...I also needed it to be made into a quilt I would enjoy looking at everyday!
After some flickr searching and google work I found what I was looking for...almost...I'd never made a cathedral window quilt block before and I found heaps of tutorials to help me out, Hyena in Petticoats has a great one and so does The Sometimes Crafter...but it wasn't quite what I was looking for....maybe I needed to look for a different block...then I found that Angie had added 'twists' to Cathedral blocks here....this was getting closer!
Most of these tutorials made more then 1 block though and that wouldn't work in this swap...then I found it! Exactly what I was looking for! A 1 block cathedral window with a twist that I could use as a centre piece for a bigger block (so I don't have to make too many extras!!) Thank you Spotted Stone!!!
I decided that as I was the only one from Queensland in the swap that I wanted to incorporate that into the swap somehow too. Aden's room has an Ocean/reef and he is getting a 'big boy' bed for Christmas and what is more 'Queensland' than the Great Barrier Reef?? Blues and Greens with reef/fish/ocean feature fabric will be just perfect! (and I was secretly super happy when Amy described my fabrics as 'the sea' without even knowing what they were for!!)
So I made a practise block taking pictures the whole time and have decided to extend my block with a uneven-sized log cabin to take the block to 12 inches finished.
So here is how I did it.
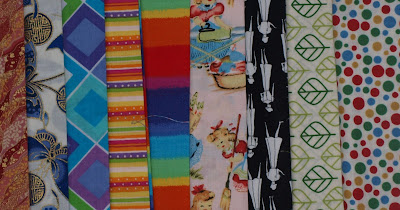
Included in the fabric packages is the 9" square of white tone-on-tone, 2 1/4" square of reef/fish fussy cut feature fabric and strips of various blue and green (mostly tone-on tone) in various lengths and widths.
You will also need a permanent fabric pen or fine point sharpie (anything that will mark the fabric, as you won't see the marks when the block is finished), a hand-sewing needle, white thread, pins and a ruler.

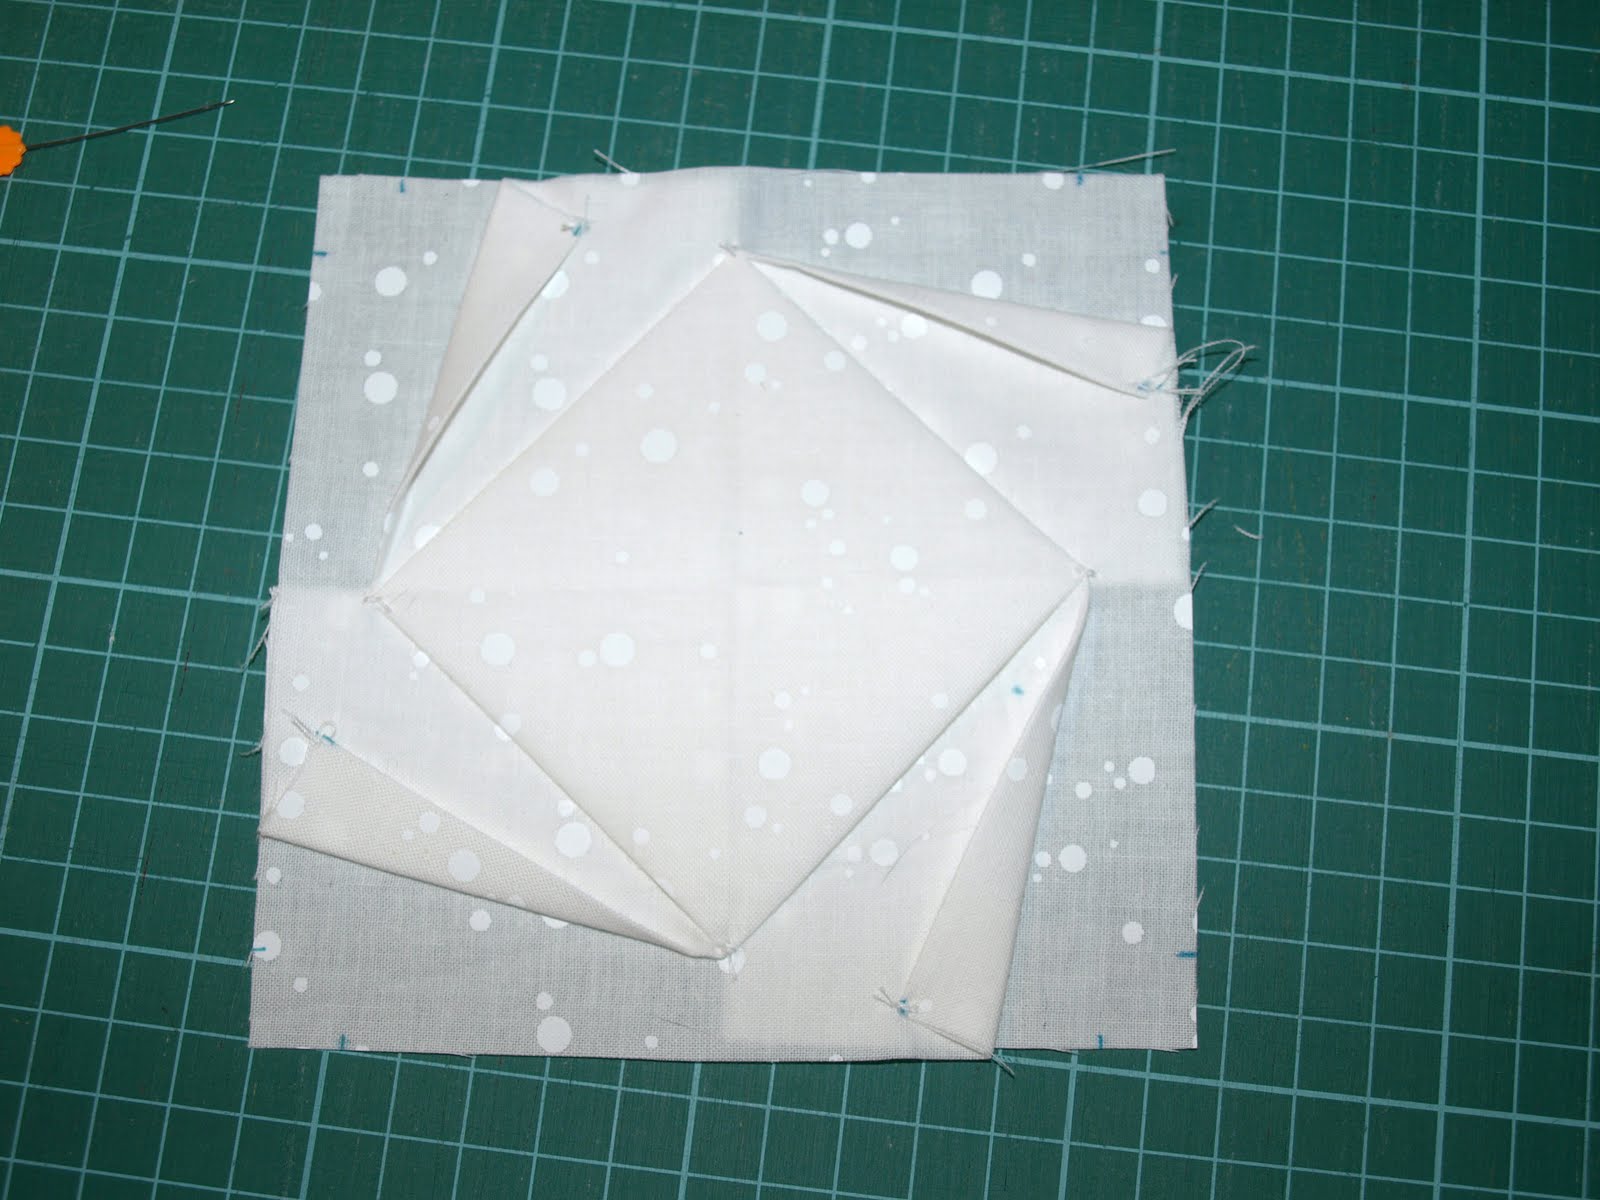
Along each side of the white 9" square you need to make 3 marks: 1 in the centre (4.5") and a 1/2 inch from either end. Repeat on each side.

Pinch the centre mark of the fabric together and move it over to the left marking, making sure the line stays parallel to the edge of the fabric and pin.


Repeat on the other 3 side going in a anti-clockwise direction.
It will look rather messy when all 4 sides are pinned but don't panic! That is what is it supposed to look like!

The fabric will naturally flatten out. Gently smooth out the folds of the fabric that you have created until it is sitting flat with a square on the front and 4 squares with a little 'hole' on the back

Tack down the points of your new inner square. This helps to line things up so that your square is straight and centered. To do this, take your threaded needle and put it through the fold on the back, bringing it up through the very tip of the point at the front. Do a couple of tiny stitches and knot off your thread. Repeat at the 3 remaining points, and remove your pins. You may be able to see a tiny bit of this tacking so use, in this case white thread (or matching thread to your background fabric).

This bit is harder to explain so use the picture for help! Fold over the straight flap coming off of the inner square and finger press it over so that its point is approximately 1/4 inch from the edge (to ensure it will be hidden within seam allowances later on). You can tack it down ( you won't see it after sewing so a little messy is fine), which I did for the first one I made but for the second one I just pinned it and left the pin there til after attaching the first of the log cabins.

Place the feature fabric on top of the square and use a pin to hold it in place
Fold the edge of the square over the feature fabric as far as you can without distorting the corners and pin it to hold. Stitch the fold down machine, as close to the edge as possible, using white thread. Repeat for the rest of the sides.
I forgot to take a picture of the process this time...I was too excited to see the finished product! Sorry! Next time I do the block I will take a picture and come back and add it in!
I found that the ends of these threads also get buried in the next seam so there are two different ways to do them. The first way I tried was to leave the threads long ( as in the picture above) and then pull the threads through to the back and 'granny' knot them together to stop them pulling back through. Or the second way I tried was to start the stitching a little way off the folded edge of the fabric and keep sewing after for a few stitches knowing that they will be caught in the log cabin seams.
So that is Part 1 of the tutorial for these blocks...part 2 to follow soon!
After some flickr searching and google work I found what I was looking for...almost...I'd never made a cathedral window quilt block before and I found heaps of tutorials to help me out, Hyena in Petticoats has a great one and so does The Sometimes Crafter...but it wasn't quite what I was looking for....maybe I needed to look for a different block...then I found that Angie had added 'twists' to Cathedral blocks here....this was getting closer!
Most of these tutorials made more then 1 block though and that wouldn't work in this swap...then I found it! Exactly what I was looking for! A 1 block cathedral window with a twist that I could use as a centre piece for a bigger block (so I don't have to make too many extras!!) Thank you Spotted Stone!!!
I decided that as I was the only one from Queensland in the swap that I wanted to incorporate that into the swap somehow too. Aden's room has an Ocean/reef and he is getting a 'big boy' bed for Christmas and what is more 'Queensland' than the Great Barrier Reef??
 Blues and Greens with reef/fish/ocean feature fabric will be just perfect! (and I was secretly super happy when Amy described my fabrics as 'the sea' without even knowing what they were for!!)
So I made a practise block taking pictures the whole time and have decided to extend my block with a uneven-sized log cabin to take the block to 12 inches finished.
So here is how I did it.
Included in the fabric packages is the 9" square of white tone-on-tone, 2 1/4" square of reef/fish fussy cut feature fabric and strips of various blue and green (mostly tone-on tone) in various lengths and widths.
You will also need a permanent fabric pen or fine point sharpie (anything that will mark the fabric, as you won't see the marks when the block is finished), a hand-sewing needle, white thread, pins and a ruler.

Along each side of the white 9" square you need to make 3 marks: 1 in the centre (4.5") and a 1/2 inch from either end. Repeat on each side.

Pinch the centre mark of the fabric together and move it over to the left marking, making sure the line stays parallel to the edge of the fabric and pin.


Repeat on the other 3 side going in a anti-clockwise direction.
It will look rather messy when all 4 sides are pinned but don't panic! That is what is it supposed to look like!


The fabric will naturally flatten out. Gently smooth out the folds of the fabric that you have created until it is sitting flat with a square on the front
 and 4 squares with a little 'hole' on the back
Tack down the points of your new inner square. This helps to line things up so that your square is straight and centered. To do this, take your threaded needle and put it through the fold on the back, bringing it up through the very tip of the point at the front. Do a couple of tiny stitches and knot off your thread. Repeat at the 3 remaining points, and remove your pins. You may be able to see a tiny bit of this tacking so use, in this case white thread (or matching thread to your background fabric).


This bit is harder to explain so use the picture for help! Fold over the straight flap coming off of the inner square and finger press it over so that its point is approximately 1/4 inch from the edge (to ensure it will be hidden within seam allowances later on). You can tack it down ( you won't see it after sewing so a little messy is fine), which I did for the first one I made but for the second one I just pinned it and left the pin there til after attaching the first of the log cabins.
Place the feature fabric on top of the square and use a pin to hold it in place

Fold the edge of the square over the feature fabric as far as you can without distorting the corners and pin it to hold. Stitch the fold down machine, as close to the edge as possible, using white thread. Repeat for the rest of the sides.

I forgot to take a picture of the process this time...I was too excited to see the finished product! Sorry! Next time I do the block I will take a picture and come back and add it in!
I found that the ends of these threads also get buried in the next seam so there are two different ways to do them. The first way I tried was to leave the threads long ( as in the picture above) and then pull the threads through to the back and 'granny' knot them together to stop them pulling back through. Or the second way I tried was to start the stitching a little way off the folded edge of the fabric and keep sewing after for a few stitches knowing that they will be caught in the log cabin seams.
So that is Part 1 of the tutorial for these blocks...part 2 to follow soon!

Comments
Can't wait to get your fabrics.
now for a question..
have you ever found a pattern for a 'wonky' teacup? i had it once & it came from an au magazine..
would love to have it again - one i really liked & would do more as wallhangings if it ever comes my way again ! :0
thx for sharing your photos of this incredible process :) ..
Ab