Posts

Showing posts with the label Mystery Quilt

The King of Diamonds

Image
The last quilt of the year! The instructions for this quilt are on my blog if you would like to make one too!! There were about 5 of us who started making this quilt with me and I think Helen is the only one also finished...I'll blog her quilt here too when I get a photo. This quilt will be in the mail soon to DH's Nanna.

Mystery Quilt......Sewing Instructions 5

Image
I don't have many photos of the next few steps...sorry...got carried away sewing it together and forgot....so you will have the use the last photo as a guide.... Take the flying geese with wings and sew four together into a row... you will end up with 6 rows of 4...make sure all the flying geese are going the same way when you sew them...I didn't...got carried away with what I was doing and had to unpick...opps! Sew 4 of the pin-wheel/flying geese together in a row...giving you two rows of 4...making diamonds in the middle... Feature Fabric/hourglass blocks sew them in alternating sequence into 3 rows of 3 then on the right hand end of each row sew the feature block/flying geese and on the other end the spare flying geese giving you three rows of FF/hourglass alternating with a flying geese (goose??) on each end. These photos are not the right colours scheme but are of a second quilt I'm making in the same pattern. Then sew the rows together as pictured....so that each feat...

Mystery Quilt......Sewing Instructions 4

Image
This is the final set of sewing instructions before laying out the quilt for its big reveal... Feature Blocks On the right hand side of 9 feaute blocks sew one hourglass block with the B (lighter) triangle against the feature print. On the remaining 3 feature blocks sew a flying geese (goose??), again onto the right, with the B (lighter) triangle against the feature print. Mini Pin-wheel blocks To each side of the pin-wheel block add a flying geese. This time the flying geese are pointing in towards the pin-wheel. A Summery of the pieces you have 24 flying geese with wings (sqaures sewn on either end) 8 pin-wheel blocks with flying geese attached to either side 9 feature/hourglass blocks 3 feature/flying geese blocks 3 flying geese - not attached to anything 4 dark squares - not attached to anything 5 border strips of feautre fabric

Mystery Quilt Fabric

Image
And more butterfly fabric (actually now that I look at it I think they are dragonflies...opps!!) again totaly different...but still wonderful!! These are from the tanlented Car I'm hoping all the girls let me show off their finished quilts here too!!

Mystery Quilt Fabric

Image
Going with the butterfly theme is Bee . More great fabric choices!! I love the chocolate colour with the pink!

Mystery Quilt Fabric

Image
This is what the wonderful Ads has used as her fabric...I love the bold choices and the way the fabrics work together...they should look stunning!!

Mystery Quilt Fabric

Image
This is what the lovely Helen has chosen as her fabrics...look out for her WIP's posts on the Mystery Quilt

Mystery Quilt......Sewing Instructions 3

Image
I've had some requests to slow down and some requests to get the next step ready....I'm really just doing them when I can fit them in!!! So for my lovely WA friends here is the next bit....enjoy! Mini Pin-Wheel Blocks Take two of the DHF units and join them together with the light traingles at right angles to each other. Then join two of these units together to make a mini pin-wheel block...not sure if this is the actual name....just what I call them! This is may favourite block of the whole quilt...They look so cute and really make the quilt....in my opinion!! You'll end up with 8! Sew a D square to each end of 24 flying geese. I've added links in the side bar on all posts about the Kings Mystery Quilt, including fabric, cutting and sewing instructions.

Mystery Quilt......Sewing Instructions 2

Image
CBC Unit (Flying Geese) Attach a C triangle to one of the short sides of triangle B. Lay Triangle B right side up on the table with the right anlge pointing away form you. Lay C down on top with the right anlge clostest to you. You will be sewing along the bias of triangle C, so becareful not to stretch them. Press seam towards dark colour. Attach another C triangle to the other side. Again press seam towards dark colour. Make 46 CBC (Flying Geese) Units Links to Sewing Instructions 1a Sewing Instructions 1b

Mystery Quilt......Sewing Instructions 1

Image
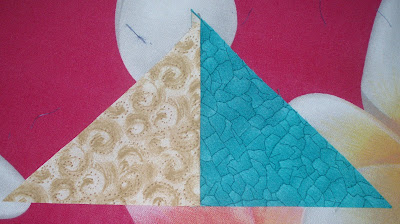
Due to my other photos becoming red x's in the cutting post I'm posting these sewing instructions in smaller chunks...hoping to avoid the problem. EB Unit Join 18 E and B triangles together, to make a new triangle.Sew each pair exactly the same way ie the same colour on top each time. Join two EB units together to make 9 hourglass blocks.

Mystery Quilt......Sewing Instructions 1a

Image
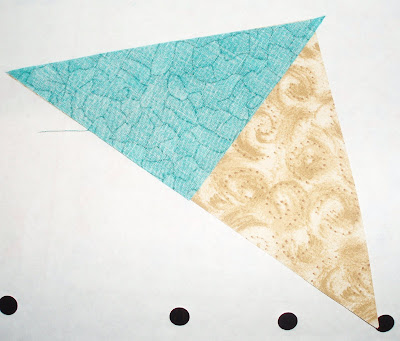
These are the first set of instructions for the sewing of the pieces of the mystery quilt....ask any questions in the comments section. GHF Unit Sew triangles G and H together. Place the right angles together ontop of each other with H on top. Sew a 1/4 inch seam. Press seam to darker fabric. When opened out H will be on the right. Make 32 GH units. Join a GH unit to an F triangle. Press seams towards the F triangle. Make 32 GHF units.

A Kings Mystery.......Cutting Instructions

Image
Bear with me as I attempt to give you instructions for a mystery quilt...I like the idea of a mystery quilt but can never bring myself to make them as I want to make sure I like the quilt before I put time and effort into it! So I designed and made a mystery quilt of my own. I have given two examples of fabric here and here . Any feature print will work well as the squares of this fabric are fairly large (6.5"). You can fussy cut them to get the best out of the fabric but you may need more fabric than instructed. Cutting instructions include seam allowances. I will be giving all the cutting instructions together. I used snap lock bags to store the pieces labeled with letters. Instructions are for rotary cutting and machine piecing. I will include pictures and diagram where needed. If something doesn't make sense please leave a comment on my blog and I will fix the problem or explain what I mean a little more. FINISHED QUILT SIZE = 54" square (135cms) Fabric Requirements ...

Mystery Quilt Fabric

Image
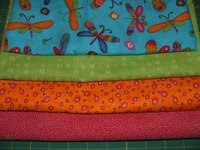
FABRIC 1 A feature print....I fussy cut these out of two FQ's that I had. FABRIC 2 A light tone-on-tone print...this one is bright but it works well with the feature print FABRIC 3 A medium toned small scale print FABRIC 4 A dark tone-on-tone fabric Another fabric sample canbe found here

Mystery Quilts...

Image
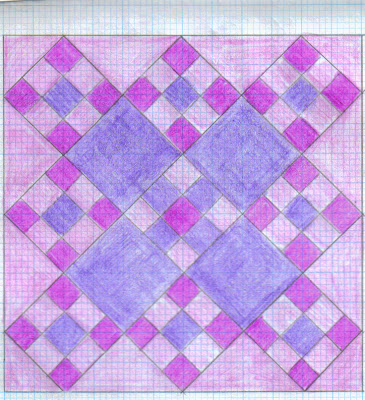
I've been intrigued by 'Mystery Quilts' for a while now...I like the idea of not knowing what it is you will end up with...but have never been game enough to start one with out waiting for the final reveal ...in case I don't like it! Strange I know!! But last night it got me thinking....and designing...I sayed up to 1am drawing and designing quilts....My grand idea now is I write instructions for my own mystery quilt...I wonder if any of the EB girls are willing to give it a try....???? It will have a feature fabric (light) that you can fussy cut the centre squares for and then 3 (2 x medium, 1 dark) contrasting fabrics....that makes interlocking blocks, that form a pattern....I have done two versions....one has more feature fabric squares and appears on point and the other one is more square..both have a feature fabric border to finish them off....and then binding in one of the medium fabrics.... I'm going to make the quilt for a friend's baby due in February.....